This guide will show you how to manage your domain as an admin. N/A • An internet connectionINTRODUCTION
SYSTEM REQUIREMENTS
WHAT YOU MAY NEED & OTHER CONSIDERATIONS
This guide will show you how to:
– Login as an administrator
– Manage the domain blacklist/whitelist
– Manage the domain quarantine
– Manage the domain quarantine reports
To access the spam filter, you will need to navigate to antispam.it-logik.com in a web browser. For steps on how to log in and change your password, please click here.
To login as an administrator, you just log in as normal with your details for HES and you will be able to manage the whole domain
Please note, if you have multiple domains with us, you will need to confirm which domain to log into for administration using the drop-down menu.
Global Allow & Block List
A Customer admin can globally allow or block email addresses or domains by adding them to your global Allow & Block List.
About Allowing & Blocking
Email addresses, domains and IPs (MSP level) can be allowed and blocked by being added to your Allow & Block List. It’s important to understand the following when using allow and block lists:
-
IP Allowing (MSP level only): Spam filtering, virus filtering, banned attachments filtering and SPF checks are not performed on IPs that are on the allow list. However, RBL checks and greylisting is still applied.
Warning
Allowed IPs bypass settings put in place for your security. Ensure an IP is trusted and details are correct before adding to your allow list.
-
Domain & Email Allowing: Spam filtering is not performed for domains or email addresses that are on the allow list. However, RBL, SPF, greylisting, virus checking and attachment scanning are still applied.
-
Blocking: Spam checking is not performed on IPs, domains or email addresses that are added to your block list, they are automatically blocked.
Allow and Block List Precedence
There are four allow & block list levels in SpamTitan. Each is accessed by logging in at the appropriate access level, or by drilling down to that level as your access allows and going to the Filtering menu:
-
MSP Allow & Block list: Entries apply to all of an MSP’s customers, all their domains and all users of those domains.
-
Customer Allow & Block list: Entries apply to all of a customer’s domains and users of those domains.
-
Domain Allow & Block list: Entries apply to a single domain and all users of that domain. For example, www.example.com.
-
User Allow & Block list: Entries apply to a single user. For example, user@example.com.
Go to Filtering > Allow & Block List and follow the steps below to add an allowed or blocked email, domain or IP.
Adding an Allowed or Blocked Email
Go to Filtering > Allow & Block List and follow the video or steps below to add an allowed or blocked email:
-
Select the Emails tab.
-
Select Add and choose Allow Email or Block Email.
-
Complete the fields in the pop up:

-
Email to Allow/Block: an email in the form of user@example.com
-
Comment (optional): Optional comments about this allow or block email.
-
-
Select Allow or Block.
Adding an Allowed or Blocked Domain
Go to Filtering > Allow & Block List and follow the video or steps below to add an allowed or blocked domain:
-
Select the Domains tab.
-
Select Add and choose Allow Domain or Block Domain.
-
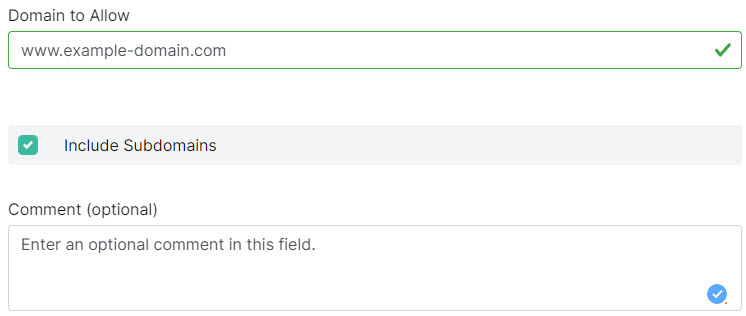
Complete the fields in the pop up:
-
Domain to Allow/Block: Enter the domain you want to allow or block.
-
Include Subdomains: If your domain is example.com and you select this option, then all domains that end in example.com will also be allowed or blocked. For example, support.example.com and products.example.com.
-
Comments (optional): Optional comments about this allow or block domain.
-
-
Select Allow or Block.
Select Quarantine in the sidebar menu to view, search and manage emails that are in quarantine.
When evaluating email for spam, SpamTitan applies hundreds of rules to arrive at an overall spam score for each email. By default, the spam score is five (5).
Email scoring above the specified spam score is considered spam and is quarantined by default. Email that scores below the spam score is considered legitimate and forwarded to the recipient.
To change the spam score setting for a domain or user, or to change the default action for email that scores above the specified spam scores, go to Policies > Domain Policies or User Policies.
The following actions can be performed:
-
Search your quarantined email. Select Advanced Filter to expand the advanced search options.
-
Select an email from the list to view more information about it.
-
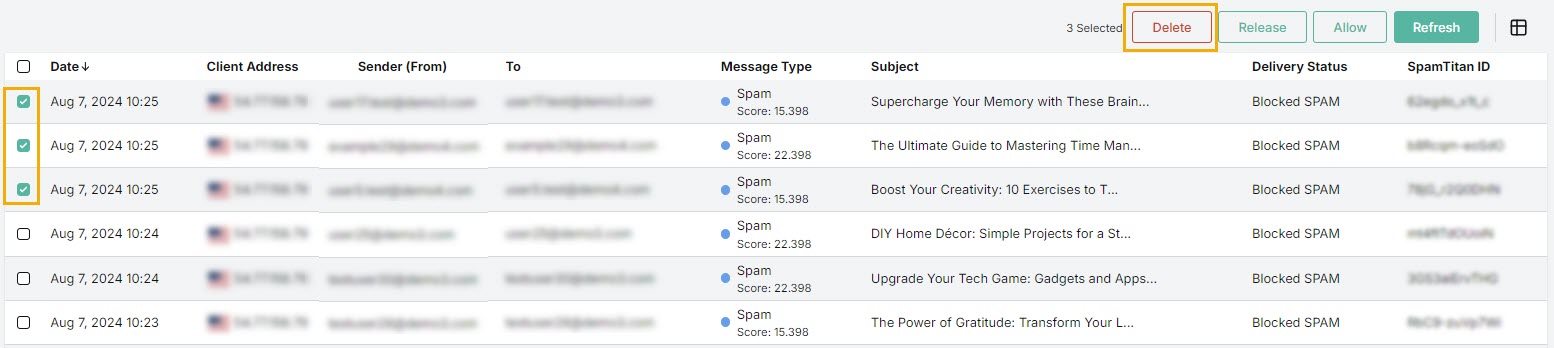
Delete an email by selecting the checkbox
 beside the email and selecting Delete. Alternatively, you can click on the email, and in the slideout, select Actions > Delete.
Multiple emails can be deleted together by selecting their checkboxes and selecting Delete.
If a message is deleted from quarantine, that message will not appear in the associated users’ quarantine, or in their quarantine report.
-
Release an email by by selecting the checkbox
beside the email and selecting Release. Alternatively, you can click on the email, and in the slideout, select Actions > Release.Occasionally, an email in quarantine may have been incorrectly identified as spam. This is known as a ‘false positive’. When you select Release, it means you release the email from quarantine and automatically forward the email to the recipient.
Multiple emails can be released together by selecting their checkboxes and selecting Release.

-
Allow an email by by selecting the checkbox
beside the email and selecting Allow. Alternatively, you can click on the email, and in the slideout, select Actions > Allow.The email address is added to your allow list and the email is released from quarantine and delivered to the recipient.
Multiple emails can be allowed together by selecting their checkboxes and selecting Allow.

-
Select the column
 icon to display the quarantine table column names. Slide each on and off to view or hide a column.
 -
Select the Refresh button to refresh the quarantine page.
SpamTitan offers several reporting options. Go to Reporting in the side bar menu where the following options are available:
-
Scheduled: Allows you to schedule daily, weekly or monthly reports that can be emailed to a single or multiple email addresses.
-
On Demand: Generate a report showing activity for today, the last seven days or all reporting periods.
-
Archive: View scheduled or on demand reports that have been archived.
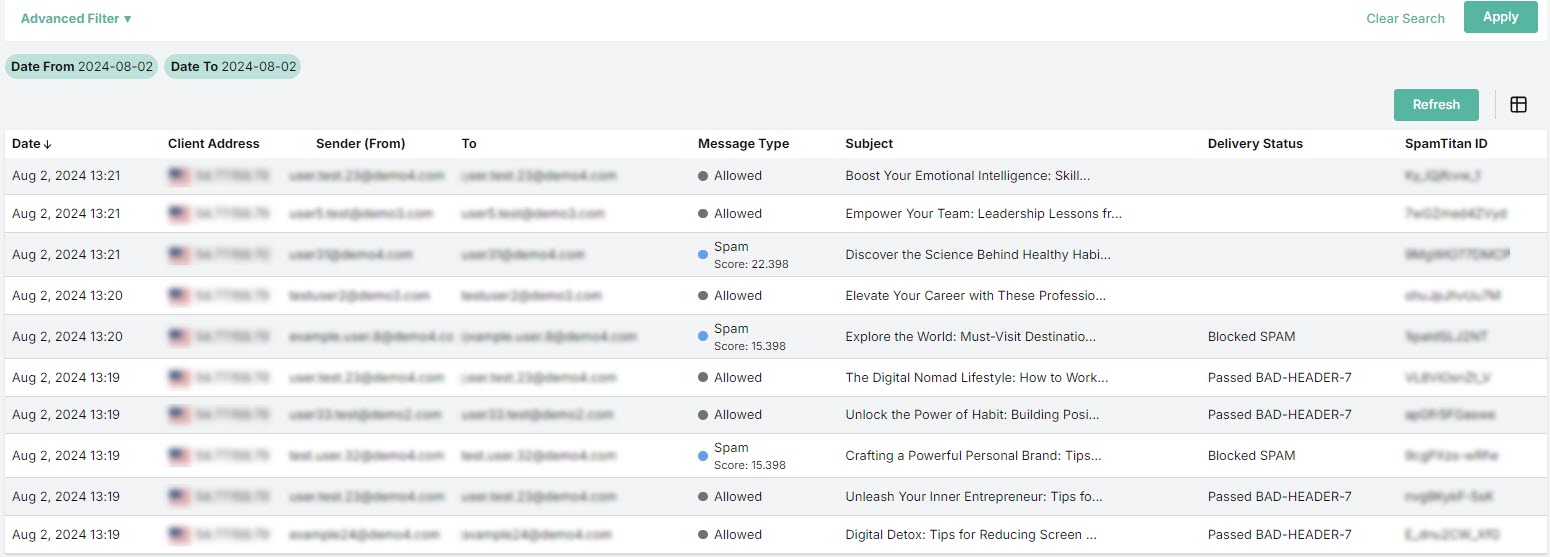
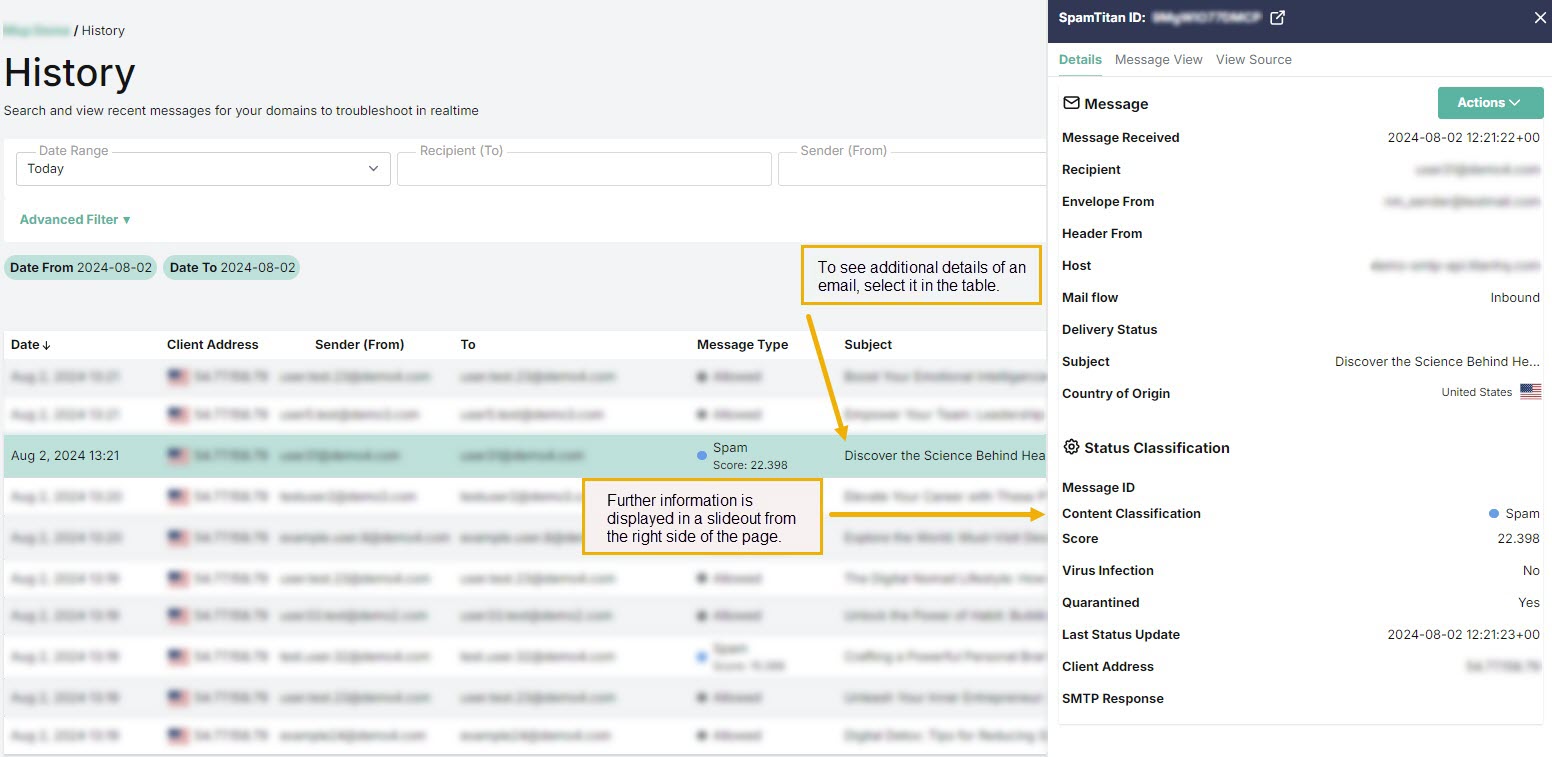
Go to the History tab in the side-bar menu to view emails that have been processed by SpamTitan.
-
Select Advanced Filter to expand the advanced search options.
-
Click the Refresh button to refresh the history list.
-
Select the column
icon to display the history table column names. Slide each on and off to view or hide a column. -
Select an email from the list to view more information about it.
History shows the following information about each email:
-
Date: Date and time the email was received.
-
Client Address: The source IP address a mail was received from.
-
Sender (From): The sender’s address which is visible in the email header.
-
To: Recipient’s email address.
-
Message Type: The type of email, as classified by SpamTitan. For example, Clean, Virus, Banned, Spam and so on.
-
Subject: Subject header of the email.
-
Delivery Status: Indicates the delivery status of a message. This can be Sent, Deferred or Bounced.
-
SpamTitan ID: A unique internal message identification number that SpamTitan assigns to each email.