A PST (aka Outlook data file) is the best file type to use for exporting emails from an online mailbox and saving this as a local copy which can be accessed any time via Outlook. Any version of Outlook for Windows. This will not work with Outlook for Mac OSX. N/AINTRODUCTION
SYSTEM REQUIREMENTS
WHAT YOU MAY NEED & OTHER CONSIDERATIONS
Outlook cannot be used by anyone while it is archiving a mailbox. Attempting to do so can corrupt the PST, crash out the export job or stop it prematurely. Please ensure you either do this on a spare PC or do not need to use the PC while the export is in progress.
Firstly, you need to set up the account you want to archive within Outlook. If you are unsure on how to do this, please see the following guide on adding a mailbox to Outlook:
https://it-logik.com/kb_articles/hosted-exchange-for-outlook-2013-2016/
Next, we recommend turning off your Outlook cache so you can archive the whole mailbox. To do this, click on the “File” tab in the top left of Outlook.

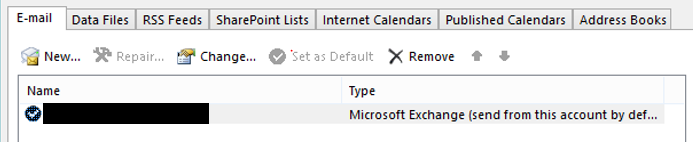
Then go into “Account Settings” and “Account Settings” once more.
You will get a pop-up displaying all the mailboxes you’ve set up in Outlook (this will not display mailboxes added with full access permissions). Double click into the mailbox you want to archive.
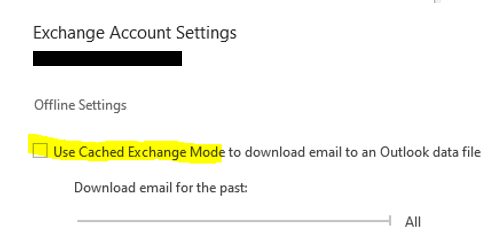
Ensure the “Use Cached Exchange Mode” check box is unchecked. Once this is unchecked, click on “OK“. You will need to close and reopen Outlook for the change to apply.
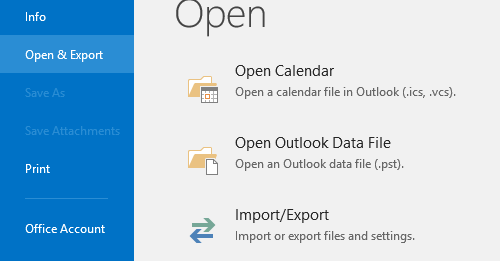
Now, to begin the export itself, go back to “File” within the top left of Outlook and select “Open & Export“, followed by “Import/Export“.
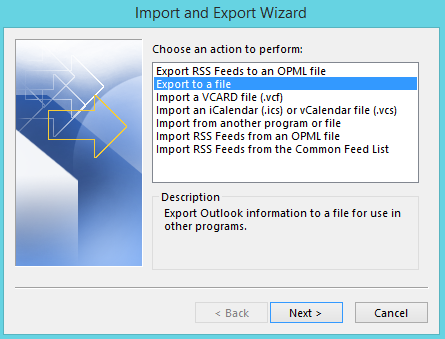
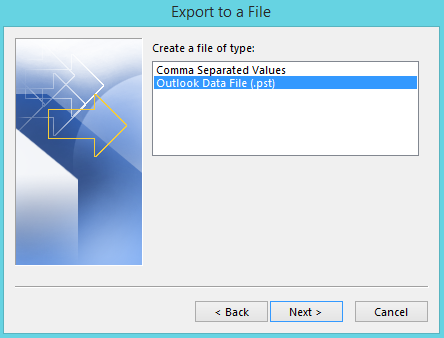
You will get a pop-up box with a few import and export options. The one we need is “Export to a file“.
Now select “Outlook Data File (.pst)” and click “Next“.
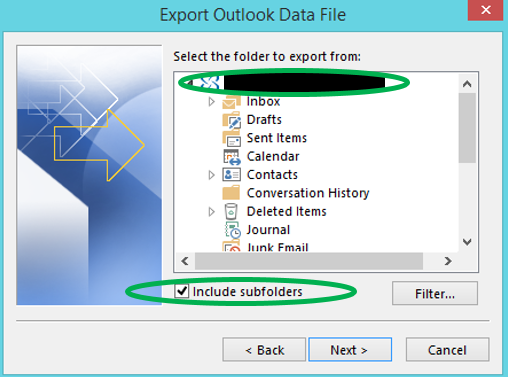
From here, find the mailbox you want to export and click on it top-level, i.e. the mailbox name at the top. Make sure to click on the checkbox “Include subfolders” to ensure you get everything and then hit “Next“.
Now choose a suitable place to store the PST file and name it sensibly for your reference. We typically name it as [email address].pst e.g. test@test.com.pst.

In addition, to save on space, we would recommend selecting the “Do not export duplicate items” option, however this is up to you.
When you’re happy, click on “Finish“.
When you hit “Finish” in step nine, you will be given the option to give the PST file a password. This is just an extra layer of protection to prevent anyone accessing the PST file without the password. If you do not want to set a password, simply hit “OK“.
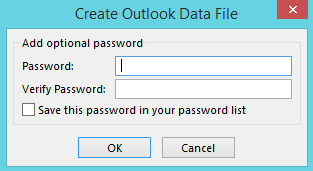
Please note: if you set a password, it cannot be changed, nor can it be reset if you forget the password. We cannot assist with this if you lose it.
Now you’re done. Outlook will begin archiving the mailbox. It’s important to note that Outlook may look like it’s crashed while exporting the mailbox, and even display as “Not Responding”. Rest assured, it is archiving the mailbox in the background. Do not interfere with this process as it can corrupt the PST file or stop it prematurely. You will get a progress bar showing the completion progress.