INTRODUCTION
Sometimes we may ask for screenshots to be sent to us to get a better look at an issue, whether it’s error messages or pop-ups. This guide will show you how to take useful screenshots.
SYSTEM REQUIREMENTS
Windows Vista+
WHAT YOU MAY NEED & OTHER CONSIDERATIONS
N/A
The tool we would recommend that is pre-installed for Windows (Vista and upwards) is called Snipping Tool. To use this, simply click the “Start” button and search “Snipping Tool”.
If you find this handy, you can right click it and select “Pin to taskbar” for easier access in the future.
When open, it will look like this:
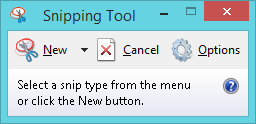
The default setting for it is “Rectangle”. This means that when you click on “New”, it will allow you to select an area in the shape of a rectangle (or square, if you’re super precise).
Once you have your screenshot, simply copy and paste it into an email or save it and forward it over as an attachment.
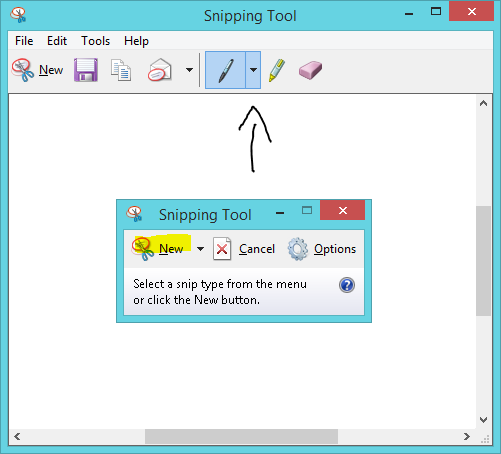
For added emphasis, you can use the highlighter or pen tools.
This method prevents taking a screenshot of a huge window which can blur the image when we try to have a closer look and prevents any sensitive information accidentally being included in a screenshot. It also helps us to see the error or pop-up much clearer.